

Get up and running in 10 minutes
Fexl Lite is built so you can be ringing real sales the same hour you download it. This page is the fast track: six steps, ten minutes, ending with a printed receipt for your first product. Every step links out to a deeper page if you need it — but you can ignore those links on the first pass and come back later.
What you’ll need
- A Windows or macOS computer (any 5-year-old laptop is fine; we’re light)
- Your license key from the Fexl purchase email
- A receipt printer (optional but worth setting up — every sale prints a receipt by default)
- About 10 minutes
Install Fexl Lite
Download the installer from your purchase email and run it. The installer is small (~80 MB) and signed; Windows SmartScreen and macOS Gatekeeper accept it without quarantine.
- Windows —
FexlLite-Setup-1.6.100.exe. Double-click and follow the prompts. Done in under a minute. - macOS —
FexlLite-1.6.100.dmg. Open and drag the app to Applications.
See Install on Windows or Install on macOS if anything trips up.
Activate your license
On first launch, Fexl Lite asks for your license key. Paste it from the purchase email and click Activate.
Activation talks to our license server once to verify the key, then runs offline forever. If your computer is offline at first launch, you can activate later from Settings → System → License.
Set up your store
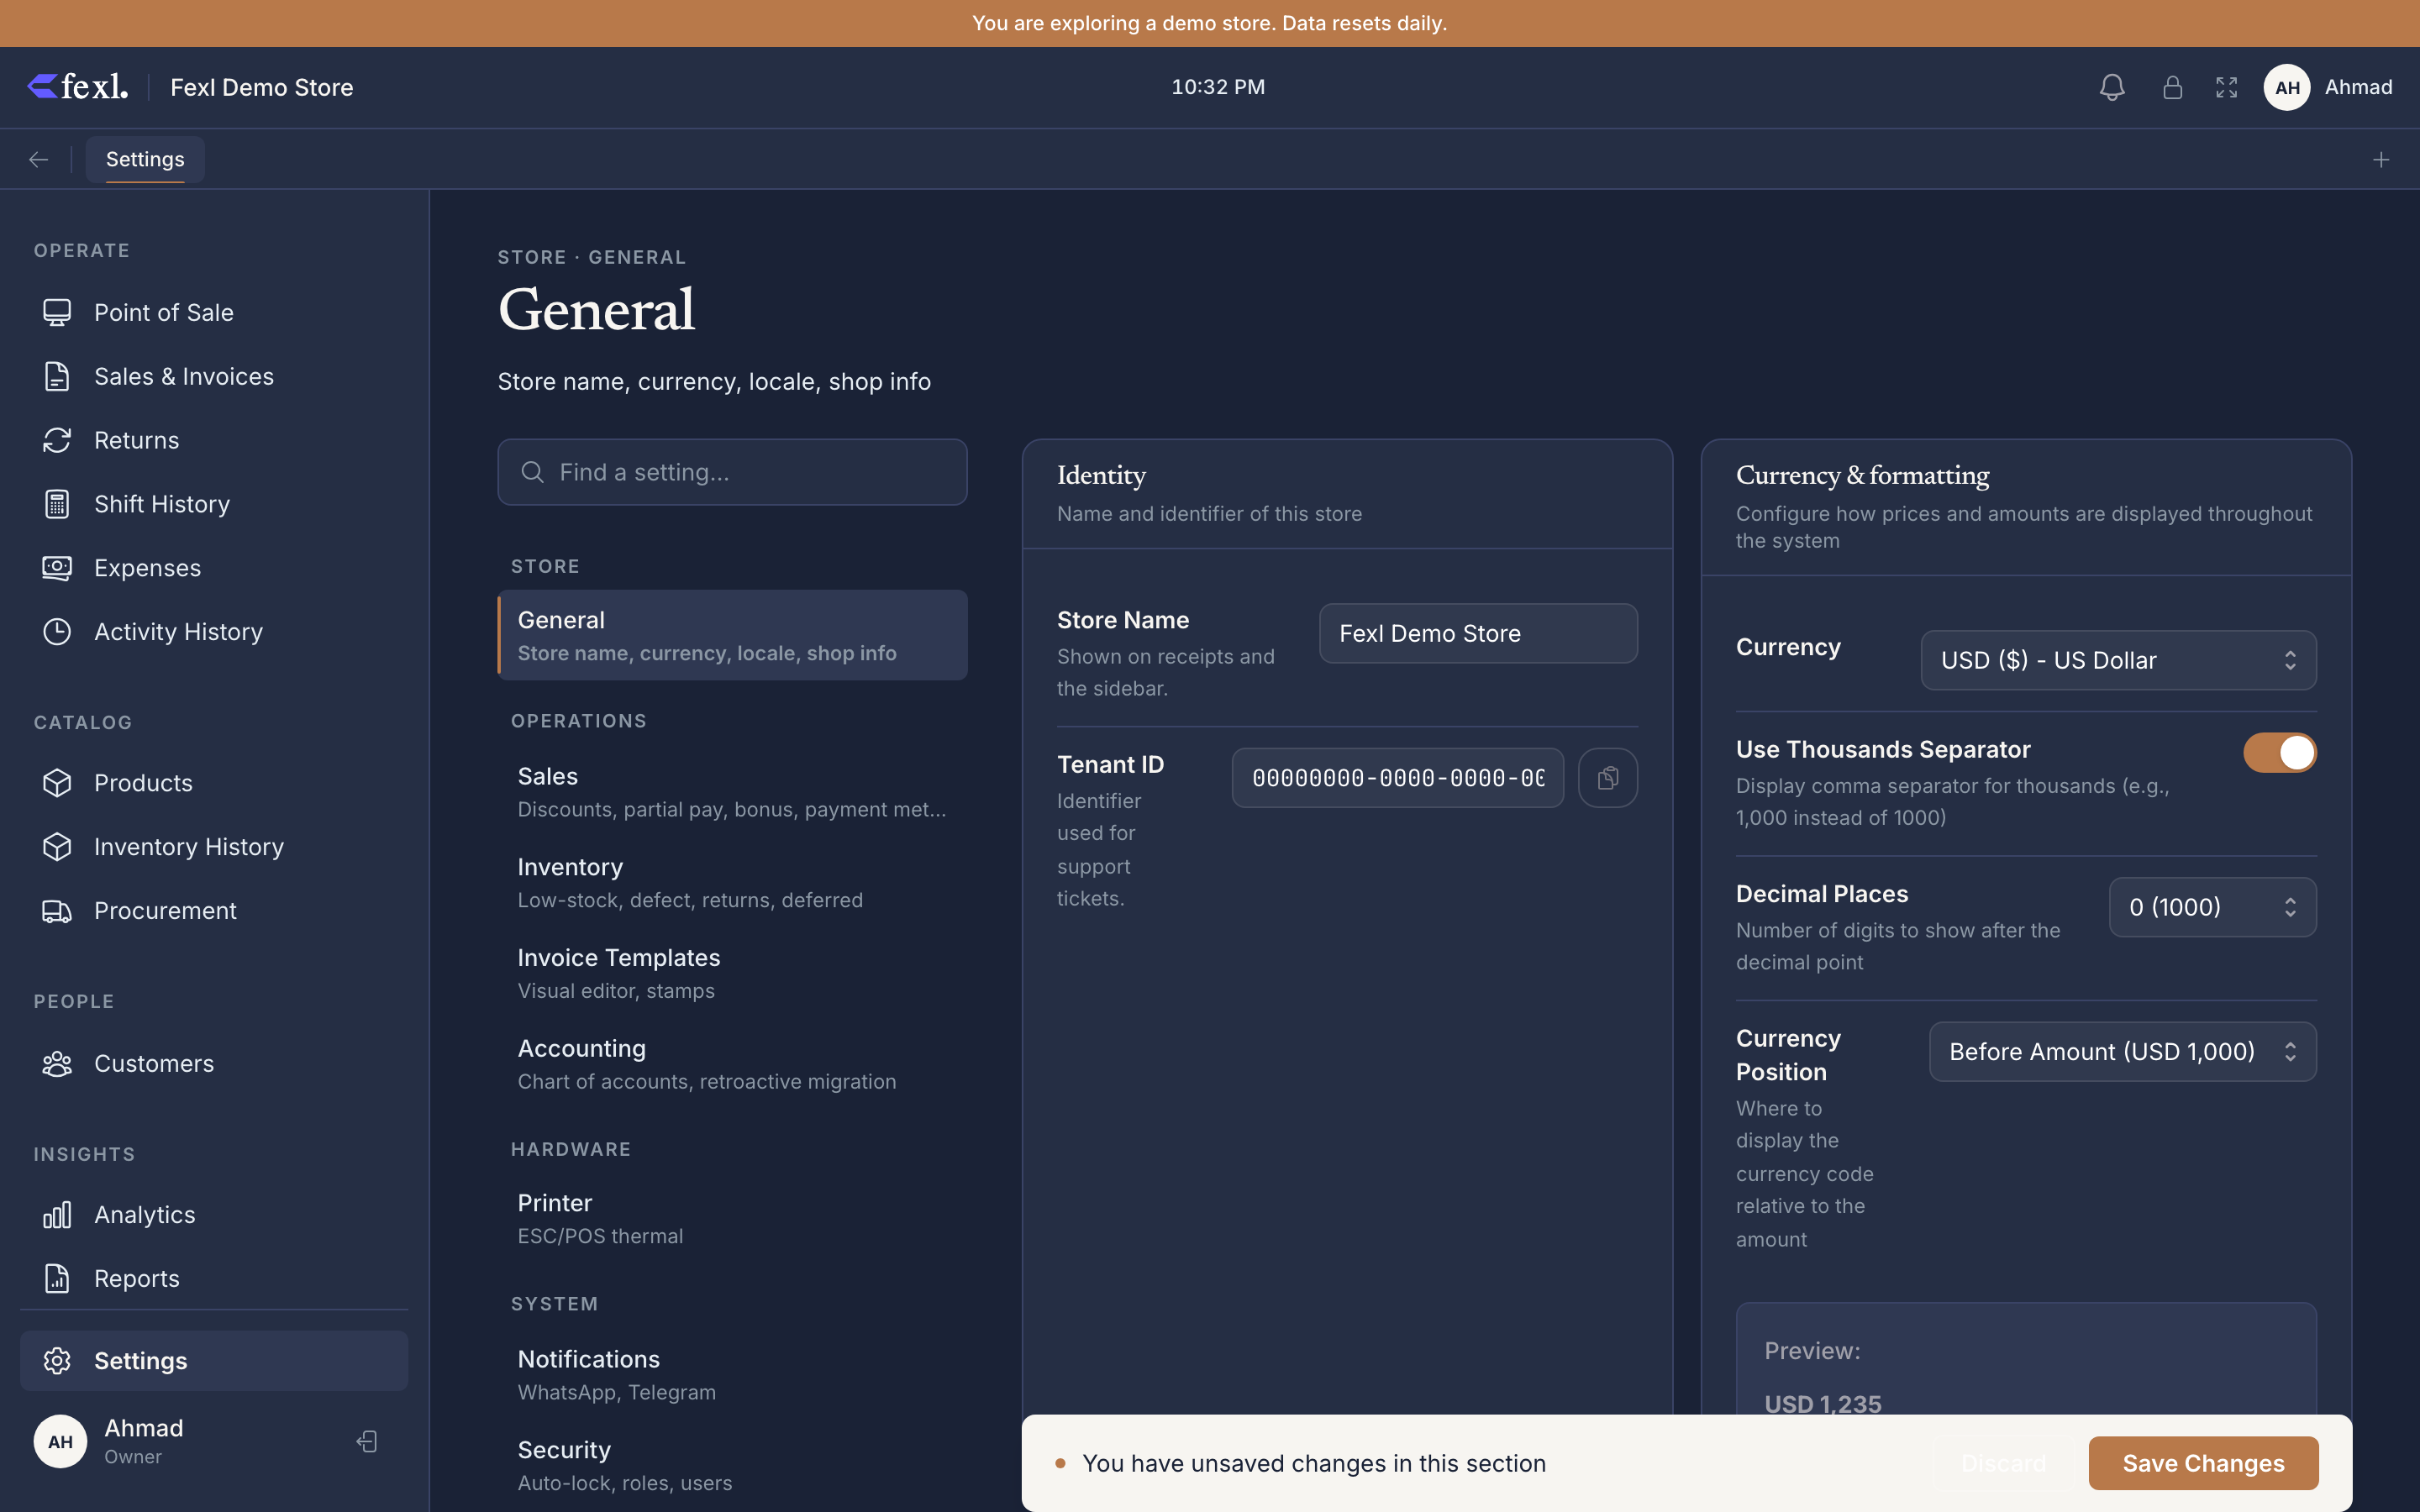
After activation you land on the Store Setup screen. Fill in:
- Store name — appears on every receipt and invoice.
- Currency — IQD, USD, EUR, MXN, or any of 40+ supported. Default formatting follows the locale.
- Address & phone — printed on the receipt header.
- Tax ID / VAT number — if your country requires it on invoices.
- Logo (optional) — 200×200 PNG. Shown on receipts and invoices.
Click Save. You can edit any of this later from Settings → General.
Connect a receipt printer (optional)
Skip this if you don’t have one yet — Fexl Lite still rings sales without printing.
- USB ESC/POS printer (Epson, Star, generic 58mm/80mm) — plug it in. Fexl Lite detects it on launch and asks if you want to use it. Say yes.
- Network printer — go to Settings → Printer → Add and enter the IP. The wizard pings it and prints a test receipt.
If your printer prints a test receipt, you’re done. If not, see Troubleshooting → Printing issues — the cause is almost always the cable, the paper width, or the driver mode.
Add your first product
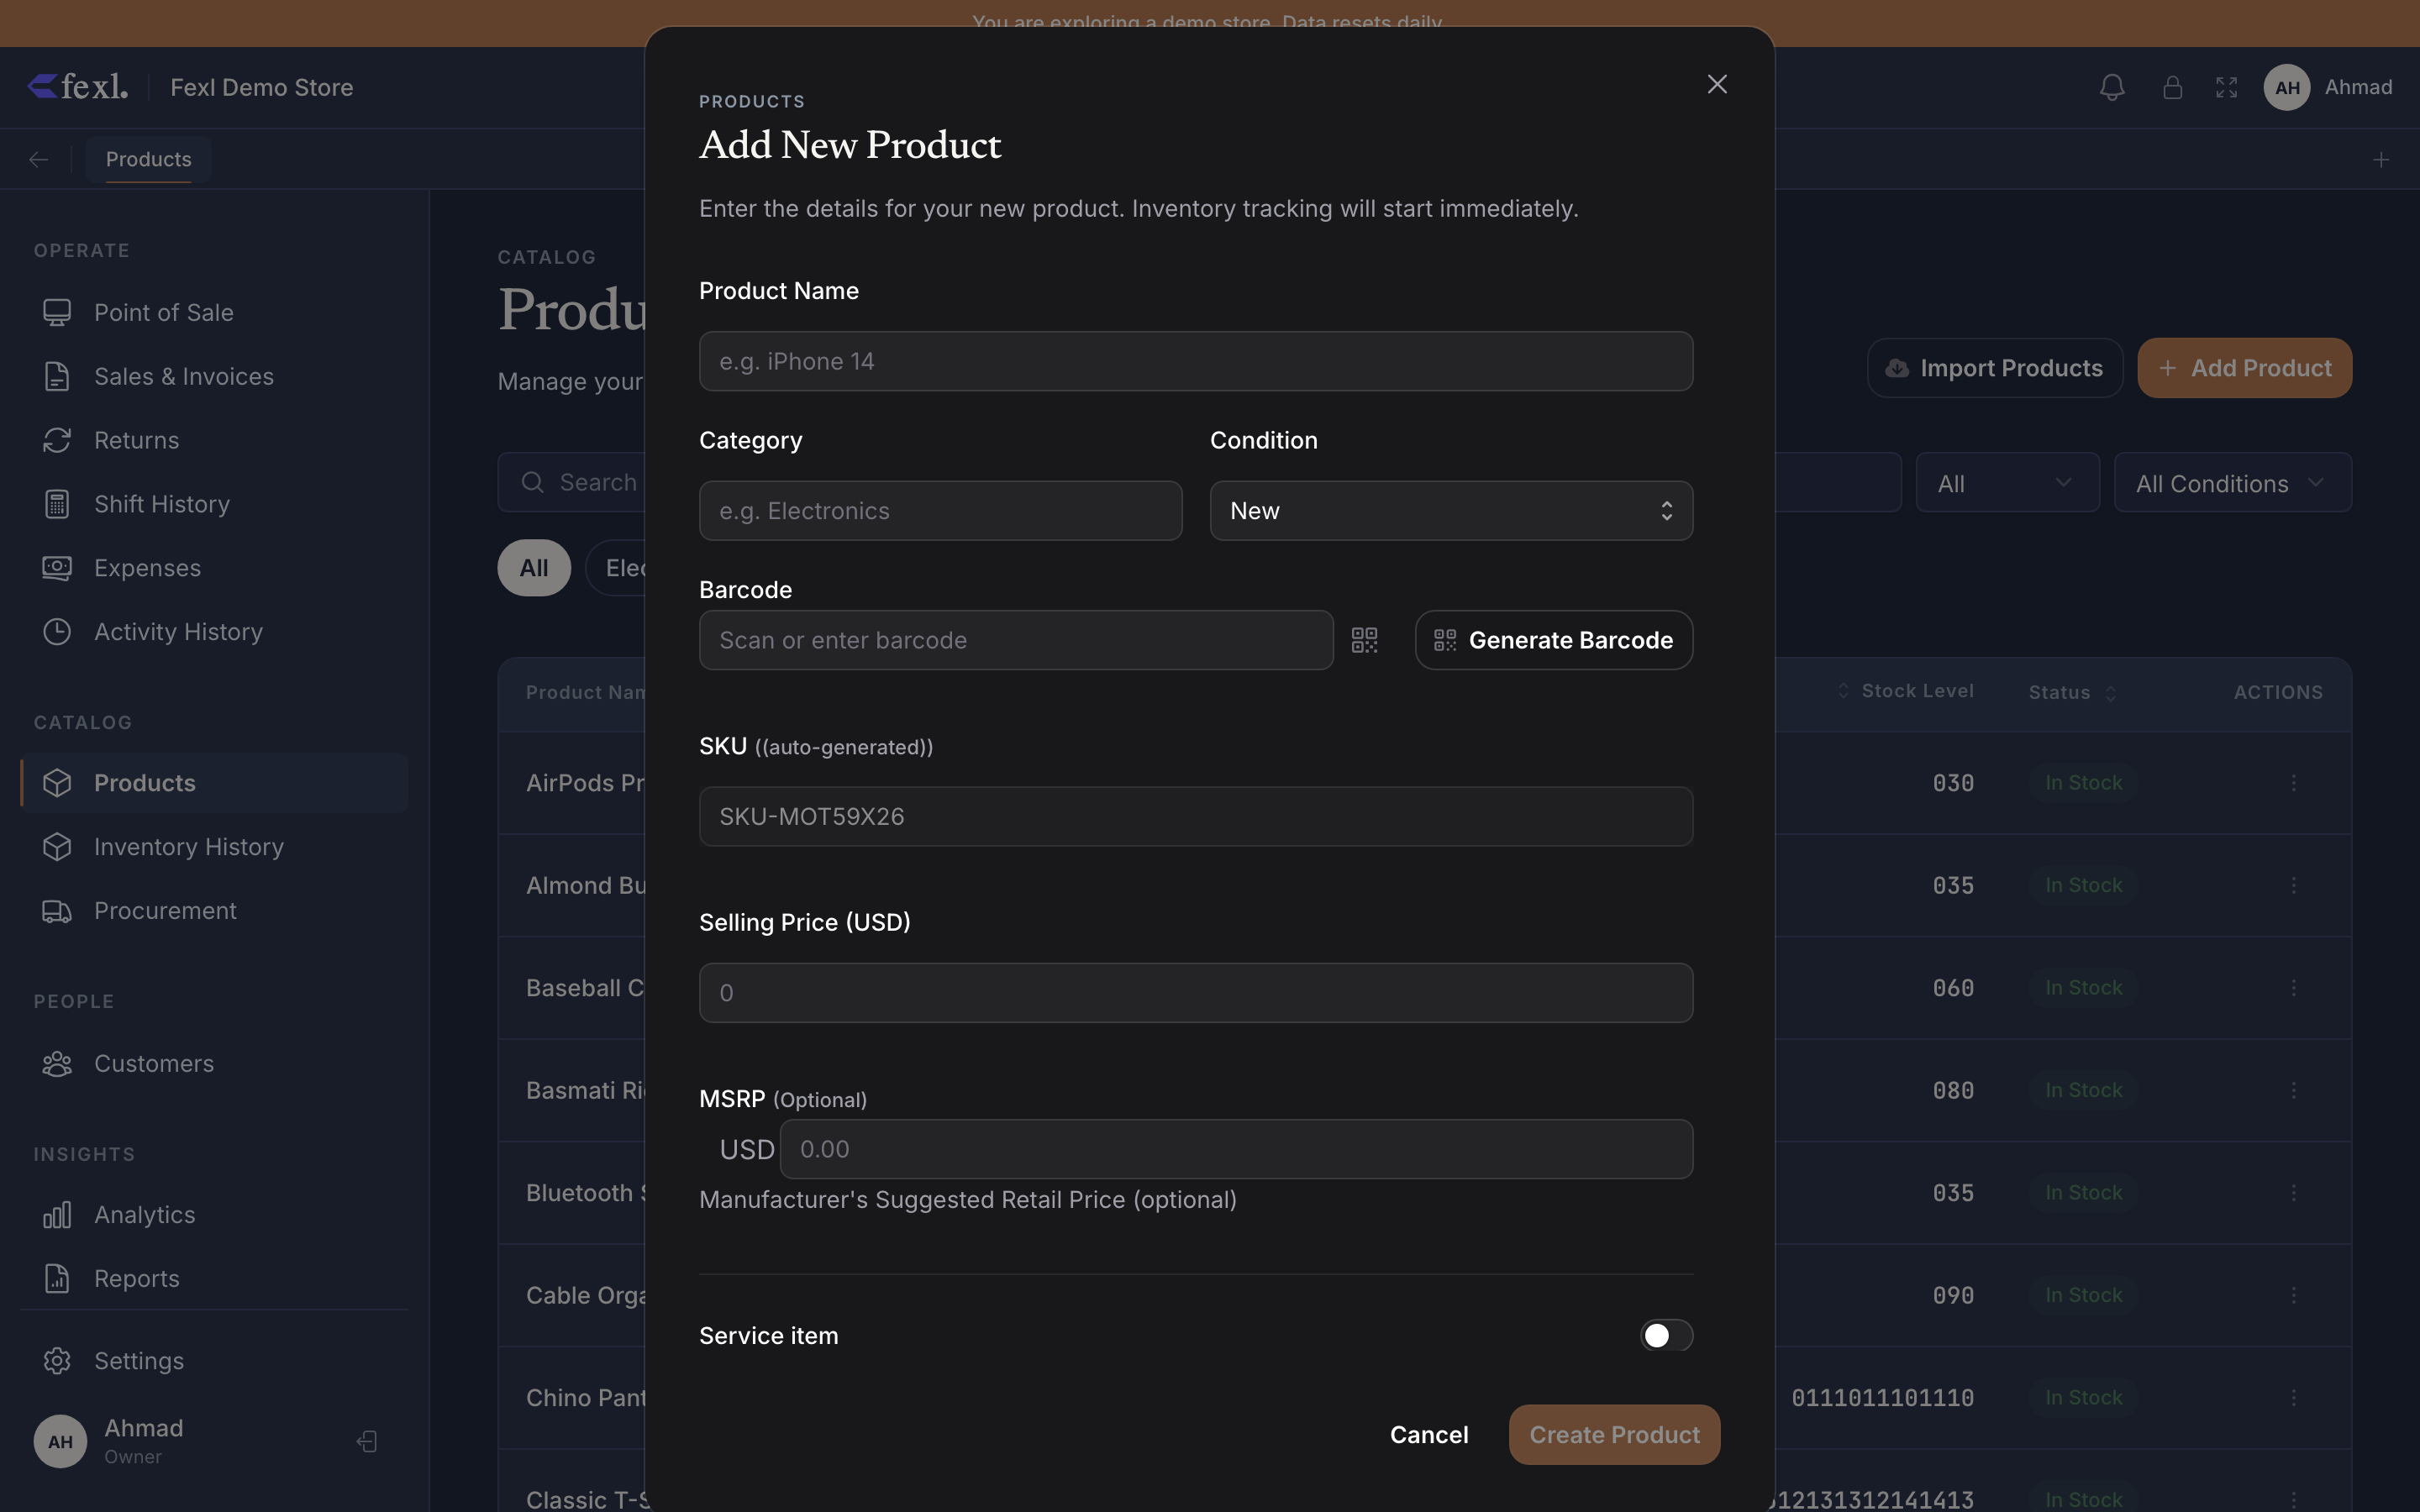
Open Products → Add Product. The minimum a sale needs is:
- Name — what shows in the cart.
- Price — what the customer pays.
- SKU or barcode — what you scan or search by.
Cost, supplier, category, variants, batches, serial numbers — all optional on day one. Add them as your inventory grows.
Click Save. The product is searchable in the POS instantly.
Ring your first sale
Click POS in the sidebar. Your default cart is open. Three options:
- Tap the product card you just added.
- Type its name in the search box.
- Scan its barcode if you printed one.
The product lands in the cart. Click the green Checkout button, pick Cash, enter the amount the customer is paying, and hit Complete Sale.
If a printer is connected, the receipt prints. The journal posts. The cart resets. You’re live.
Where to go next
You’re up and running. Here’s where most new users go in their first week:
Finish store setup
5Receipt template, payment methods, VAT, currency formatting — the rest of the configuration that wasn’t strictly required at first launch.
Add a second device
Pair a tablet, second register, or back-office computer to the same store. Sync keeps them all in lockstep.
Set up inventory tracking
Choose tracking modes (quantity / serial / batch), add suppliers, generate barcodes, set low-stock alerts.
Add customers + tabs
Capture customer details for marketing, debt tracking, and statements. On-the-fly creation works at the POS too.
Configure receipt printers
USB or network ESC/POS, multi-printer setups for kitchen routing, label printers for product tags.
See what's happening
Daily report, sales by item, inventory valuation. The accounting reports work from day one — no setup.
Need help?
- Email support — support@fexl.io. Replies in under 4 hours during Iraq business hours.
- WhatsApp — number is on your purchase email. Faster for “right now” issues mid-shift.
- The wiki — every screen, every setting, every button is documented. Use the search ( ⌘ K ) to find anything by name.