

Invoice detail page
Click any row on the invoices list and the detail dialog opens. This is the only screen in Fexl Lite where you can act on a finalised sale — print it, refund it, cancel it, save it as PDF, mark a pay-later balance settled. Everything that touches a single invoice runs through this one panel.
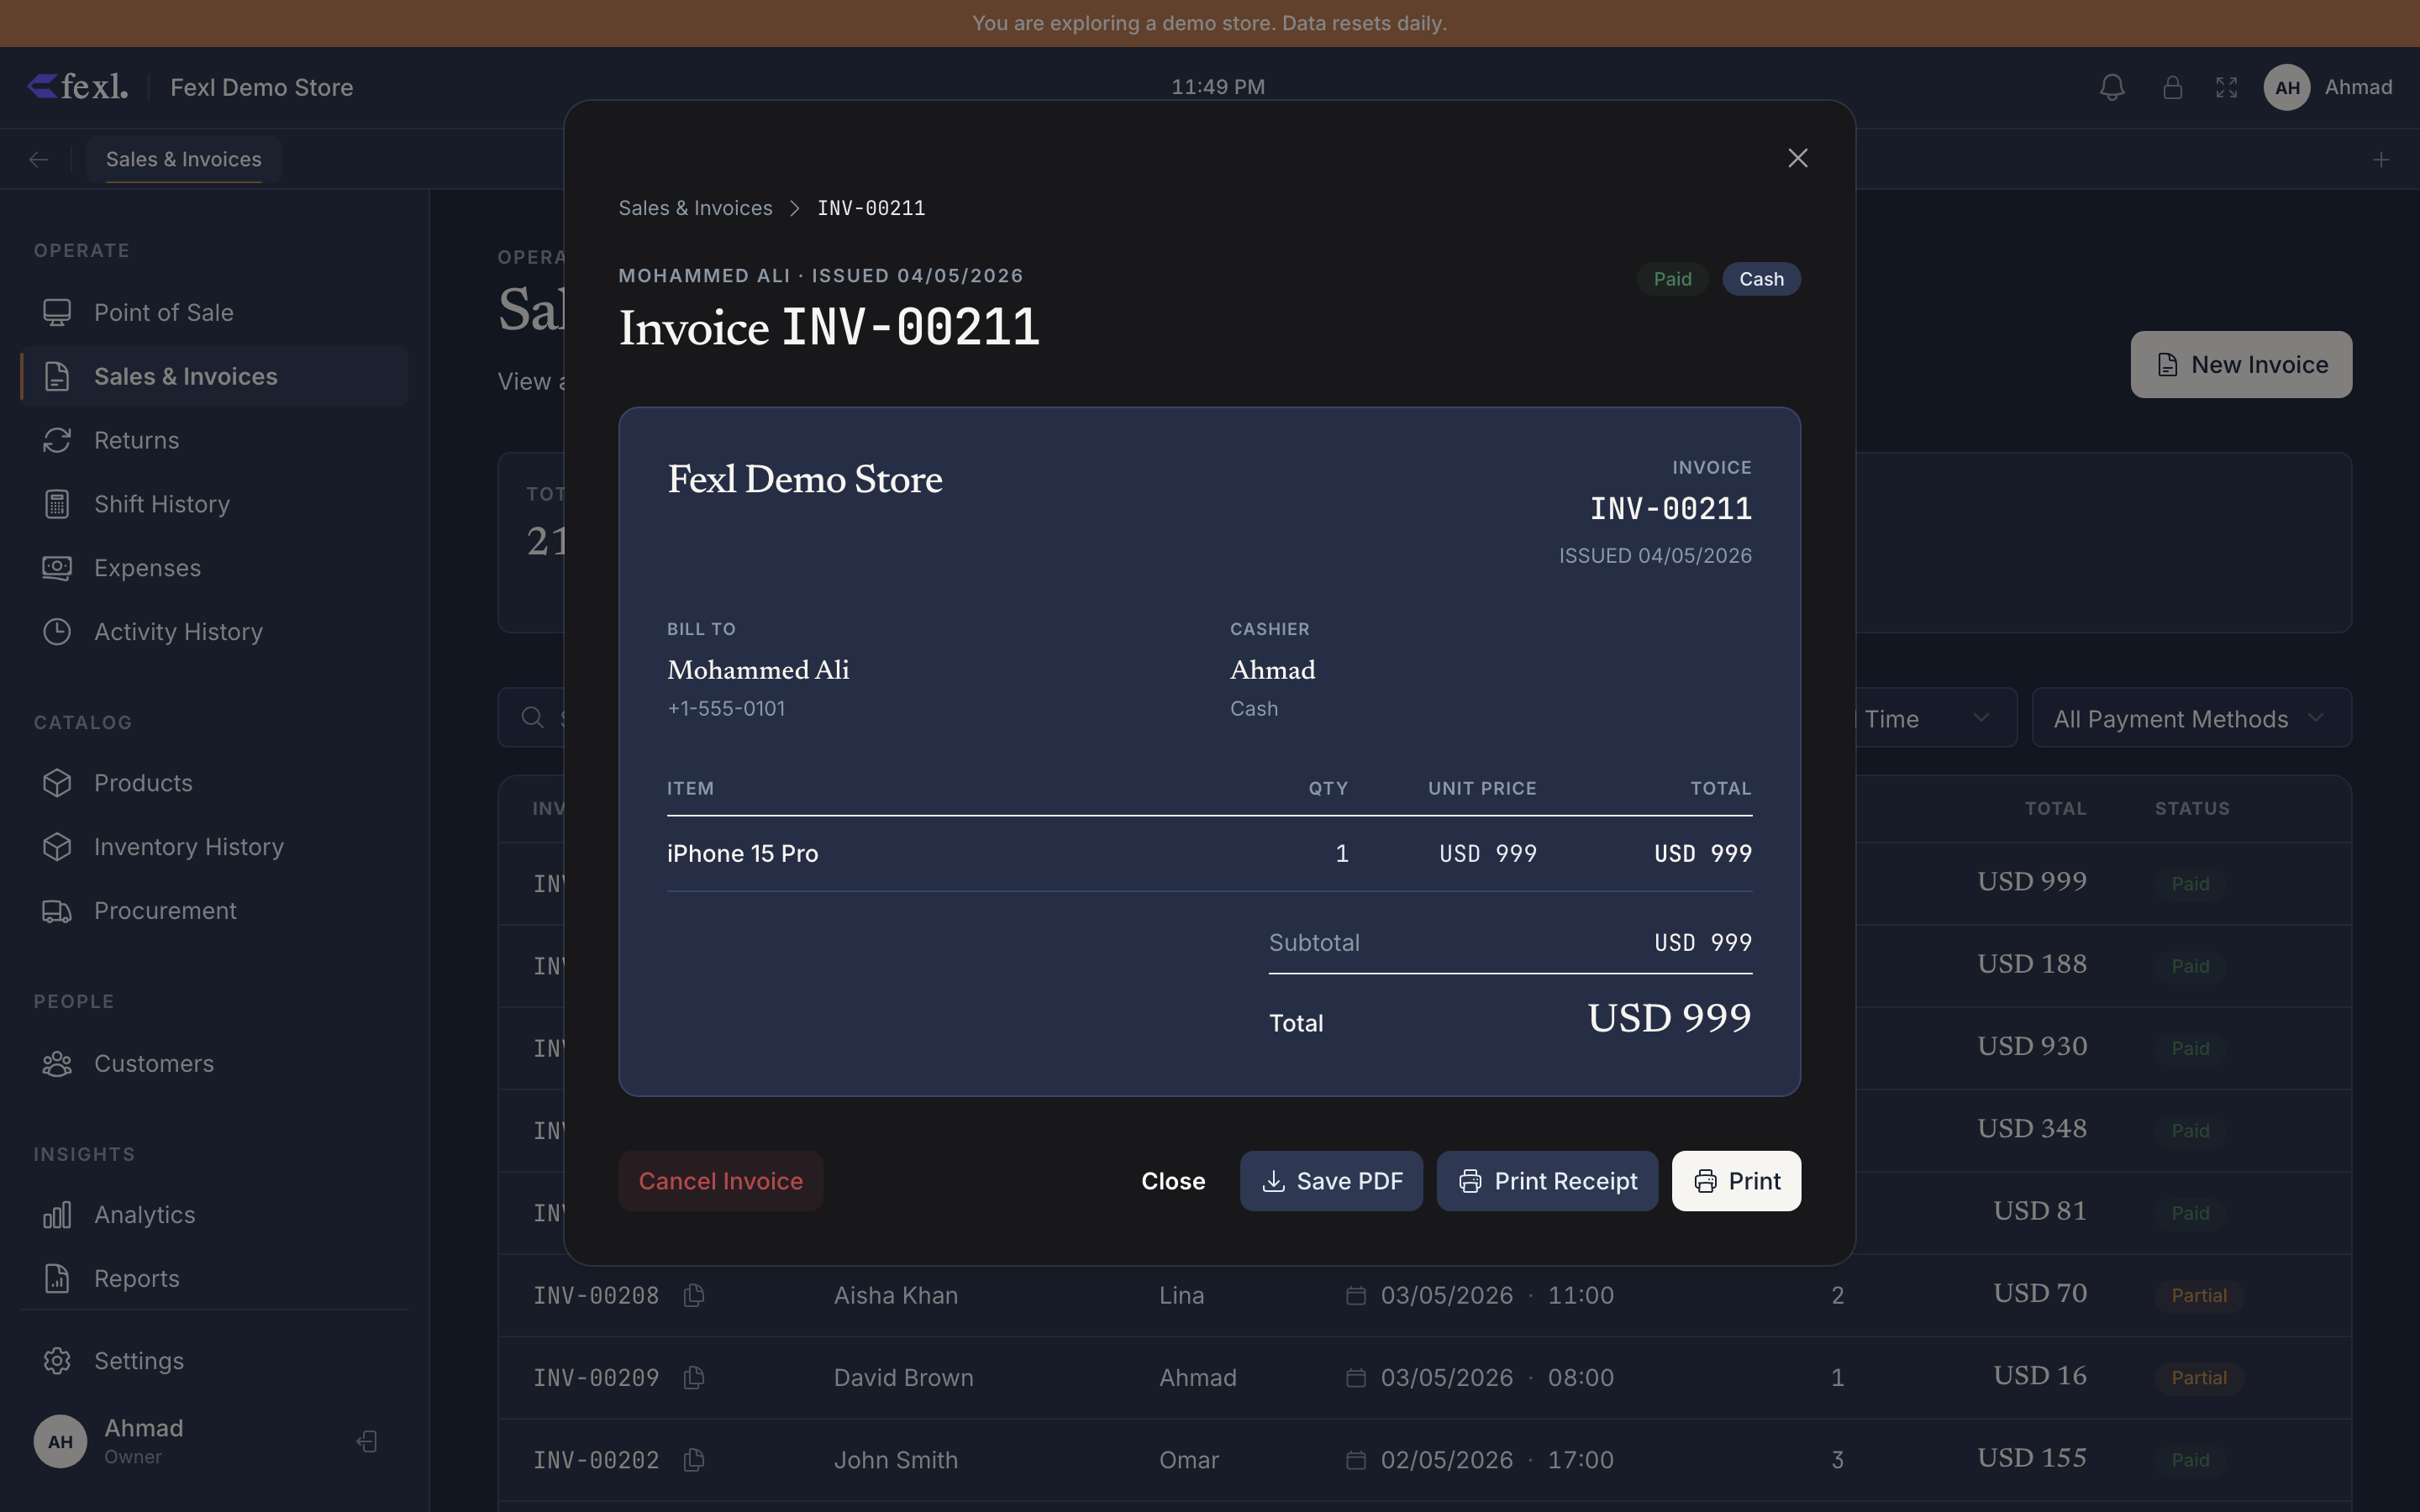
Header
The header carries everything you need to identify the sale at a glance:
- Invoice number — copyable with one click.
- Status badge — the same single-state badge from the list view. Resolved via the same helper, so the list and the dialog can never disagree.
- Payment-method chips — one chip per method that touched the sale. A split invoice shows two or three chips; a pay-later sale shows a yellow Partial chip with the owed amount; a comp shows a purple Comp chip.
- Customer name + phone — links to the customer detail page when one was attached at checkout.
- Date / time — the original sale timestamp, not the
updated_at.
Below the header, the delegate tag appears if a delegate was assigned at checkout (commission posts to 6070 with the offset on 2030).
Body
The body lists every line item with quantity, unit price, line discount (if any), and line total. Serialised lines show the IMEIs underneath each row; batch lines show the lot number and expiry date. Bonus lines render with a teal Bonus chip and a 0.00 line total — their cost still flows through COGS, but to 5020 rather than 5010.
Under the items table:
- Subtotal, discount, VAT, shipping, total.
- Payment summary — for partials, this lists
paidandowed. For splits, every method gets its own row with the amount and the change-due if it was a cash overpayment. - Returns (when present) — each completed return inlines as its own row with refund amount, settlement account, and a link to the return record.
Action bar
Three buttons sit in the dialog footer. Two are always available; the destructive ones are permission-gated.
Save PDF / Print A4
Save PDF downloads the invoice as a PDF using your active A4 template. Print sends it to the system print dialog. Both render through the same template engine — what you see in the preview is exactly what prints.
Print Receipt (thermal)
Print Receipt routes the same invoice through the configured ESC/POS thermal printer at 80mm width. Desktop only — Tauri talks to the printer over USB via the Rust receipt module. If no printer is connected, you get one clean error with a deep-link to Settings → Printer, not the raw driver message.
Cancel invoice
Permission-gated (invoices:void). Opens the cancel flow, where you pick stock dispositions per line and confirm. A reversing journal entry posts atomically. See Cancel an invoice for the full mechanics.
Apply refund
Doesn’t run from this dialog — opens the 5-step return wizard pre-seeded with this invoice. Once a refund completes, the invoice picks up a Returned chip and the total cell on the list shows the net.
Pay later — record settlement
On a partial / pay-later invoice, a Pay debt action appears. It opens the customer’s debt-payment dialog with this invoice pre-selected as the FIFO target. See Pay debt.
Friction to know about
If you cancel an invoice and the toast says something like failed to insert defect record for serial X, that is the real error — read it, fix the underlying data (a deleted product, a missing supplier reference, a wiped serial), and retry. Earlier builds masked these behind a generic “failed to fetch updated invoice”; v2.2.0 surfaces the actual sub-step.