

Create a manual invoice
A manual invoice is for sales that don’t pass through the POS register: a phone order, a wholesale customer who emailed their list, a delivery quote, a non-physical service like a repair or consultation, or end-of-day reconciliation for a sale that was missed at the till. The form lives at Invoices → Create Invoice and produces the same kind of invoice document — same numbering, same journal entries, same printable receipt — but skips everything POS-specific: no scanner listener, no cart hotkeys, no auto-print, no requirement that a cash-drawer shift be open.
When to use this (vs POS)
The POS screen is built for a customer standing at the counter: scanner-driven, hotkey-heavy, multi-cart aware, dated automatically to now, and tied to the open cash-drawer shift. That’s the right tool for register transactions and nothing else.
Reach for Create Invoice instead when:
- A customer phones in an order that the courier will deliver later.
- A wholesale buyer emails a long line list and you want to enter it once, not scan it.
- You’re billing for a service — labour, repair, consultation — with no inventory line behind it.
- A sale was rung manually on paper yesterday and you’re reconciling the books today (set the invoice date to yesterday).
- You need to issue an invoice without affecting the cash drawer (no shift required until you actually take payment).
The form
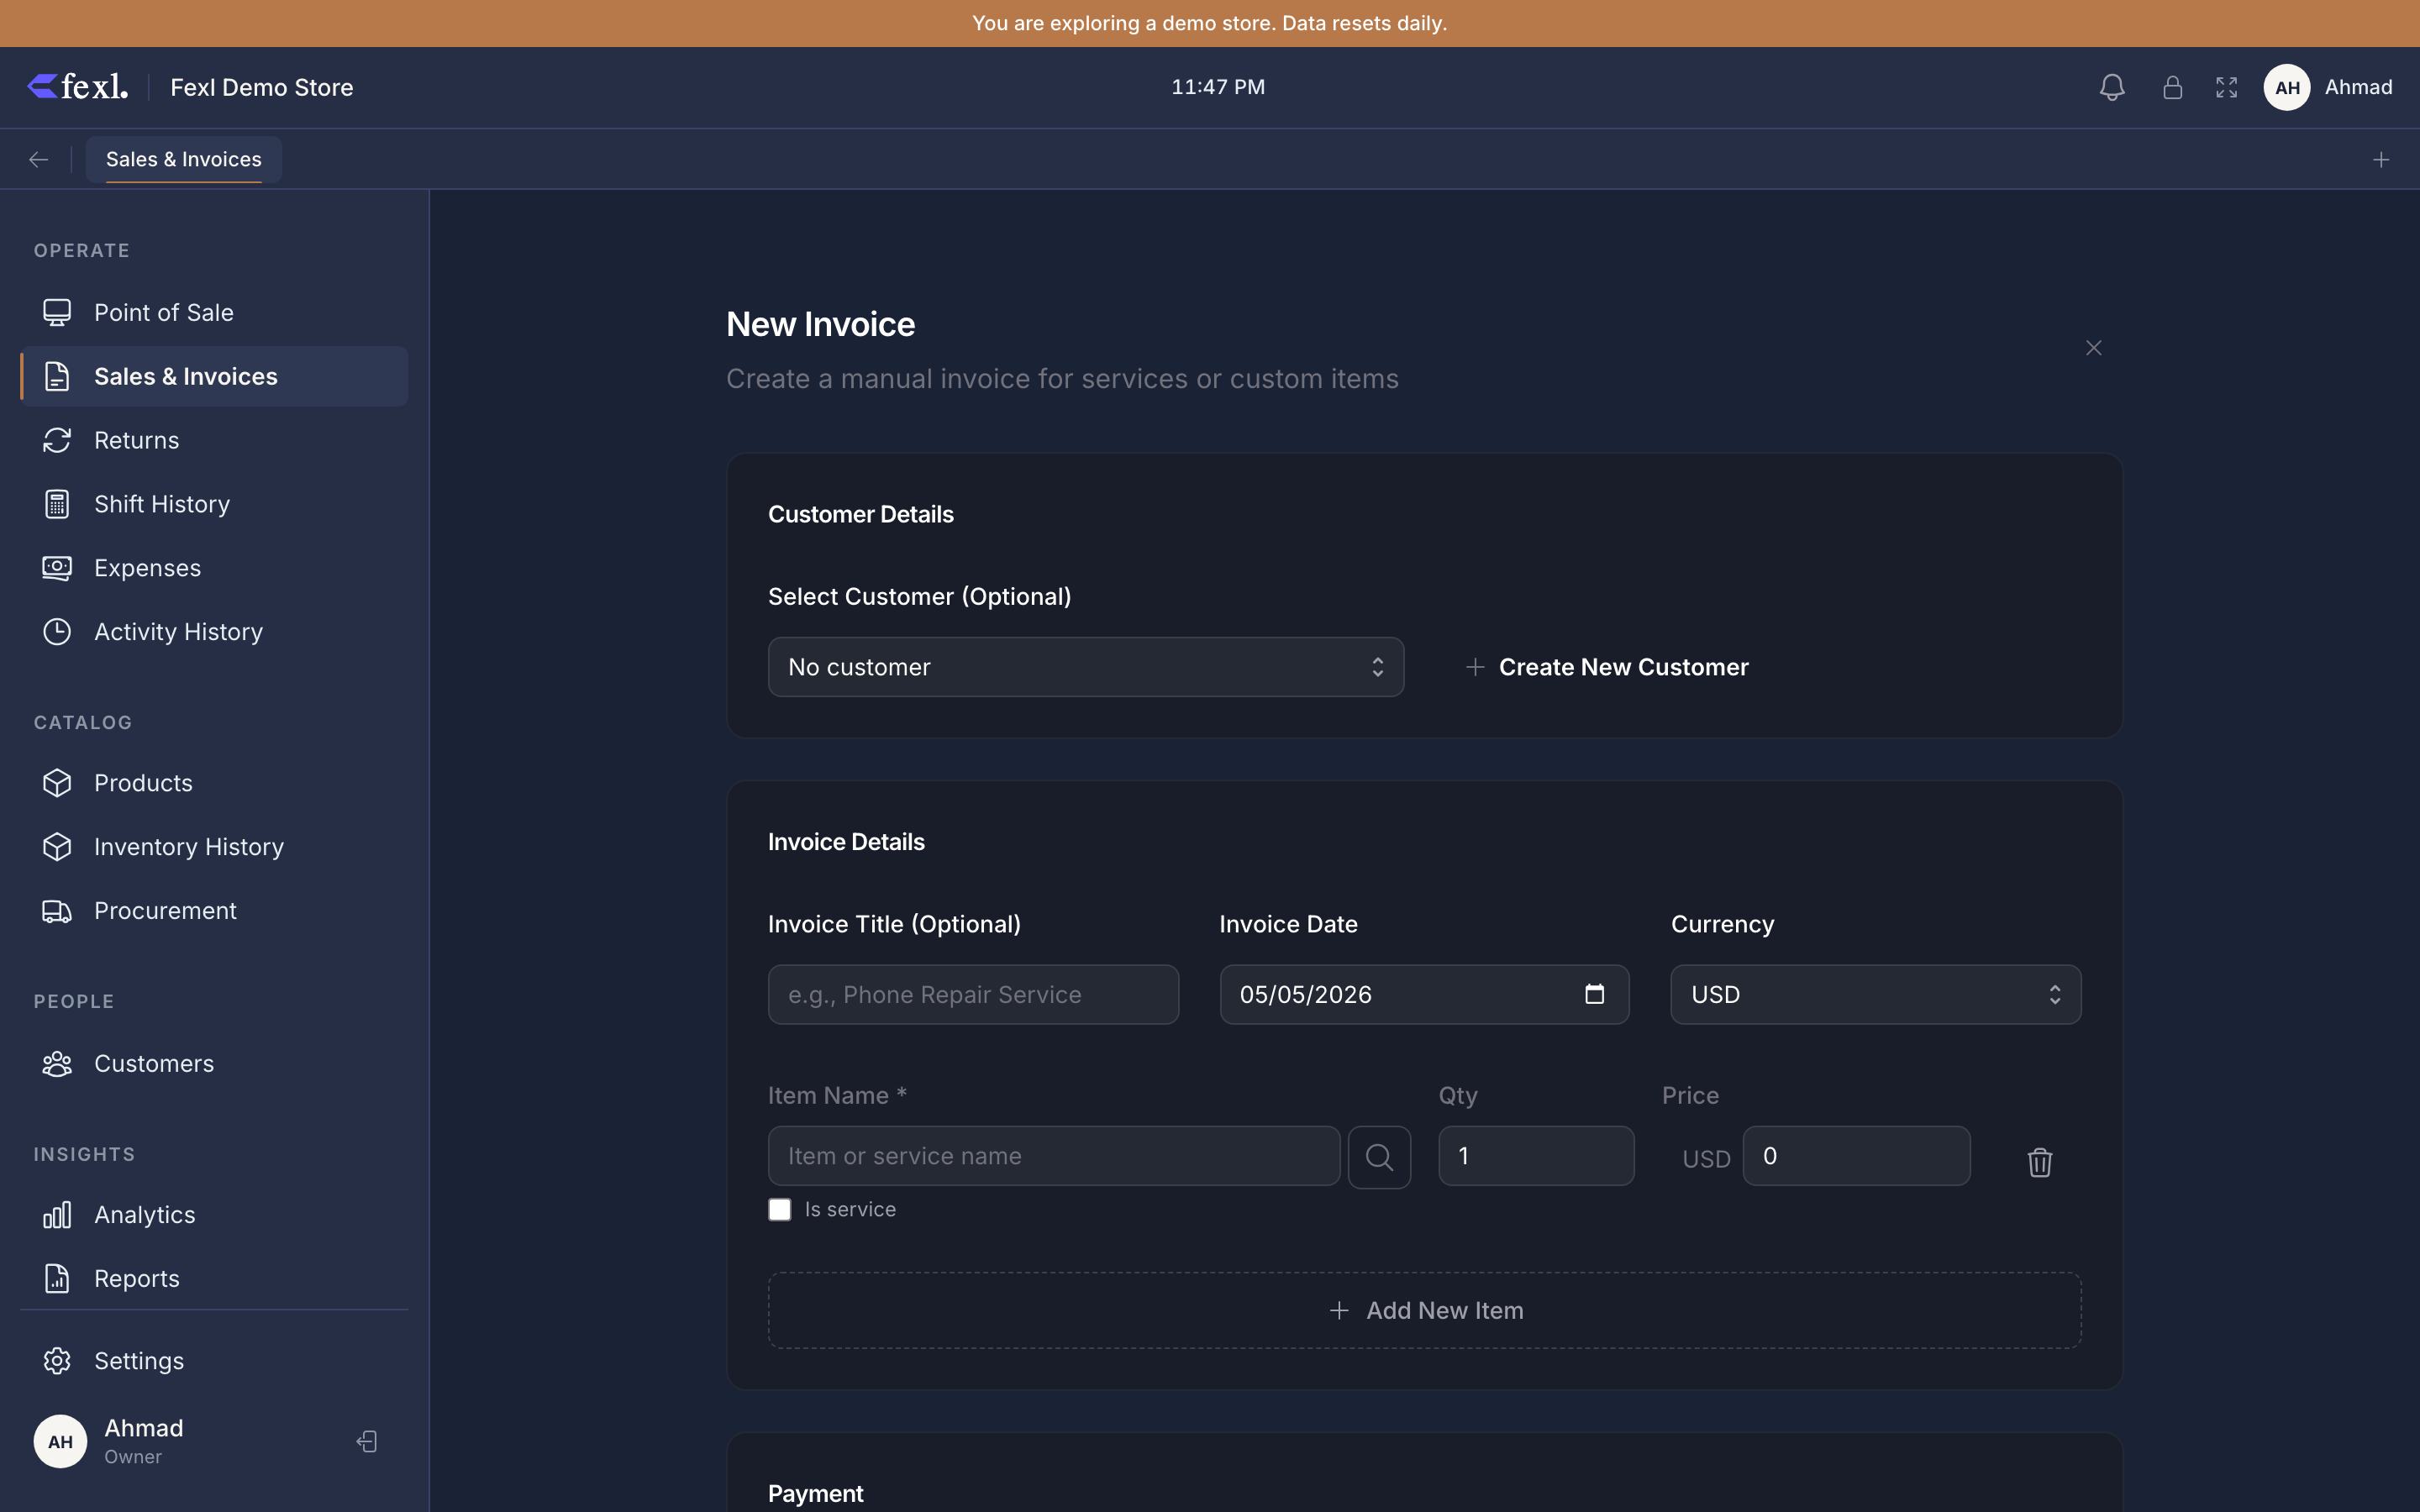
Open the form
Go to Invoices in the sidebar, then click Create Invoice at the top right. The form opens with one empty line item and today’s date already filled in.
Pick a customer (optional)
Use the Select Customer dropdown to attach an existing customer, or click Create New Customer to add one inline — name, phone, email, internal notes, and an optional printable note that appears on the receipt. A customer is optional for a walk-in style sale, but required if the invoice is going on a tab (partial payment with debt remaining).
Fill the invoice header
Three fields:
- Invoice Title (optional) — free text like Phone Repair Service or April Wholesale Order. Shows on the printed invoice.
- Invoice Date — defaults to today. Change it freely to backdate; there’s no special permission gate on this form, so use it carefully if your books are closed for the period.
- Currency — USD, IQD, EUR, or GBP. Defaults to your tenant’s currency.
Add line items
Each row has Item Name, Qty, and Price. Two ways to fill the item:
- Free text — just type the name. Use this for services, custom work, or anything not in your inventory. A free-text line shows an Is service checkbox; tick it for labour / consultation / repair fees so the revenue posts to 4015 Service Revenue instead of 4010 Sales.
- Linked to inventory — click the magnifier icon next to the name field, then search by name, SKU, or barcode. Picking a product fills the name and price for you, and a small
Linked to inventorychip appears under the field. Inventory-linked lines deduct stock and post COGS on save.
For variable products (parent products with size / colour / etc. variants), picking the parent now opens the variant picker since v1.6.105 so you can specify which variant you’re billing. Pre-fix the form silently fell back to the parent and failed to deduct stock from the right variant, leaving the variant’s on-hand drift one unit each time.
Click Add New Item for more rows. The trash icon removes a row (the last row can’t be removed — there’s always at least one).
Choose payment method and type
In the Payment section, pick a Payment Method (Cash, Card, Bank Transfer, etc. — whatever you’ve configured in Settings → Sales → Payment Methods) and a Payment Type:
- Full — customer paid the whole amount.
- Partial — customer paid part, the rest goes on their tab. A second row of fields appears for the Amount Paid and a Due Date (either days from now or a specific date). Enter
0as the amount to log it as pure pay-later debt.
An optional Delegate dropdown appears below if the delegate feature is on — pick whoever should get commission on the sale.
Save
Hit Create Invoice. The journal entry posts immediately, stock deducts on any inventory-linked lines, and a success dialog opens with Print (A4) and Print Receipt (thermal) buttons. Closing the dialog returns you to the Invoices list with the new invoice at the top.
Differences from POS
Print after saving
The success dialog stays open after the invoice is created so you can print without leaving the page:
- Print — A4 invoice (letterhead-style, customer copy).
- Print Receipt — thermal receipt (80mm ESC/POS printer).
- Close — skip printing; you can always re-print later from the invoice’s detail page.
If you saw Serial Number: 1689 instead of the real IMEI on a printed manual invoice in versions before v1.6.100, that’s the regression fixed by #62 v1.6.100 . The print buttons used to fetch invoice data from the list endpoint, which skipped the serial-identifier enricher; they now refetch the single invoice via GET /api/invoices/:id, which runs the enricher and returns the actual IMEI / serial. Update to v1.6.100 or later — no client setting to change.
Related
- Backdated invoices — when the invoice date is in the past and what to watch for around period close
- Invoice list & detail — finding, filtering, and re-printing saved invoices
- Print A4 or thermal receipt — printer setup and template options
- Customers — managing the customer directory and debt / credit balances
- Release notes — v1.6.100 — full list of fixes including bug #62